CLICK HERE TO GET THE INPUT FILE: RaleInput_012
How should one design a low inrush current
three phase universal autotransformer
for 10kVA continuous output power as per IEC 61558 ?
Technical specification relevant only to design
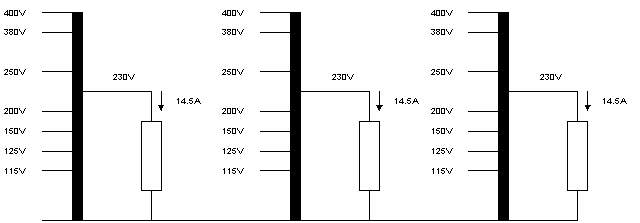
Electrical data and schema
| Input voltages per phase | 115V, 125V, 150V, 200V, 250V, 380V, 400V |
| Frequency | 50/60Hz |
| Nominal output voltage | 230V |
| Nominal output current | 14.5A (10kVA all phases) |
Ambient and operating conditions
| Ambient temperature | 40°C |
| Mode of operation | Continuous operation |
| Test conditions | Non-inherently short-circuit proof |
Specifications
• Autotransformer as per IEC 61558
• Insulation class E

Design criteria
An autotransformer with non-inherently short-circuit protection as per IEC 61558 is equipped with a internal protection. Very often, we arrive at a combined protection solution consisting of a primary-side fuse (short circuit protection) and a thermal fuse (overload protection qt 125°C). For this reason, short-circuit and overload is not design criteria. The criterion for design for purposes of IEC 61558 is only temperature T nominal at the overvoltage of 10%.
| Insulation class | A | E | B | F | H |
|
Max winding temperature in nominal operating mode T nominal (°C) |
100 | 115 | 120 | 140 | 165 |
Insulation class E
Max winding temperature in nominal operating mode =115°C.
The criterion for design
The autotransformer has to be designed for the temperature rise <75°K at 40°C ambient temperature and insulation class E.
Bobbin
An autotransformer is constructed exclusively with single-section bobbin units.
Induction and Fe-quality
Low Inrush-current transformers are operated at a low induction (1.2T-1.5T). In the output range up to approx. 200VA, cold-rolled Fe quality 5.3W/kg is used at 1.5T, 50Hz. Over and above that, we find cold-rolled Fe-quality 4.00W/kg at 1.5T, 50Hz and grain-oriented Fe-quality 1.11W/kg at 1.5T, 50Hz.
Inrush current
The peak value of the inrush current in the first period after switch-on at the zero-axis crossing point should not exceed a factor of 15 x the peak value for nominal input current. This can best be achieved if:
• The nominal induction is 1.2T-1.5T.
• The core is constructed with a defined gap of approx. 0.05-0.10 mm, so as to reduce residual magnetism (remanence).
Design procedure
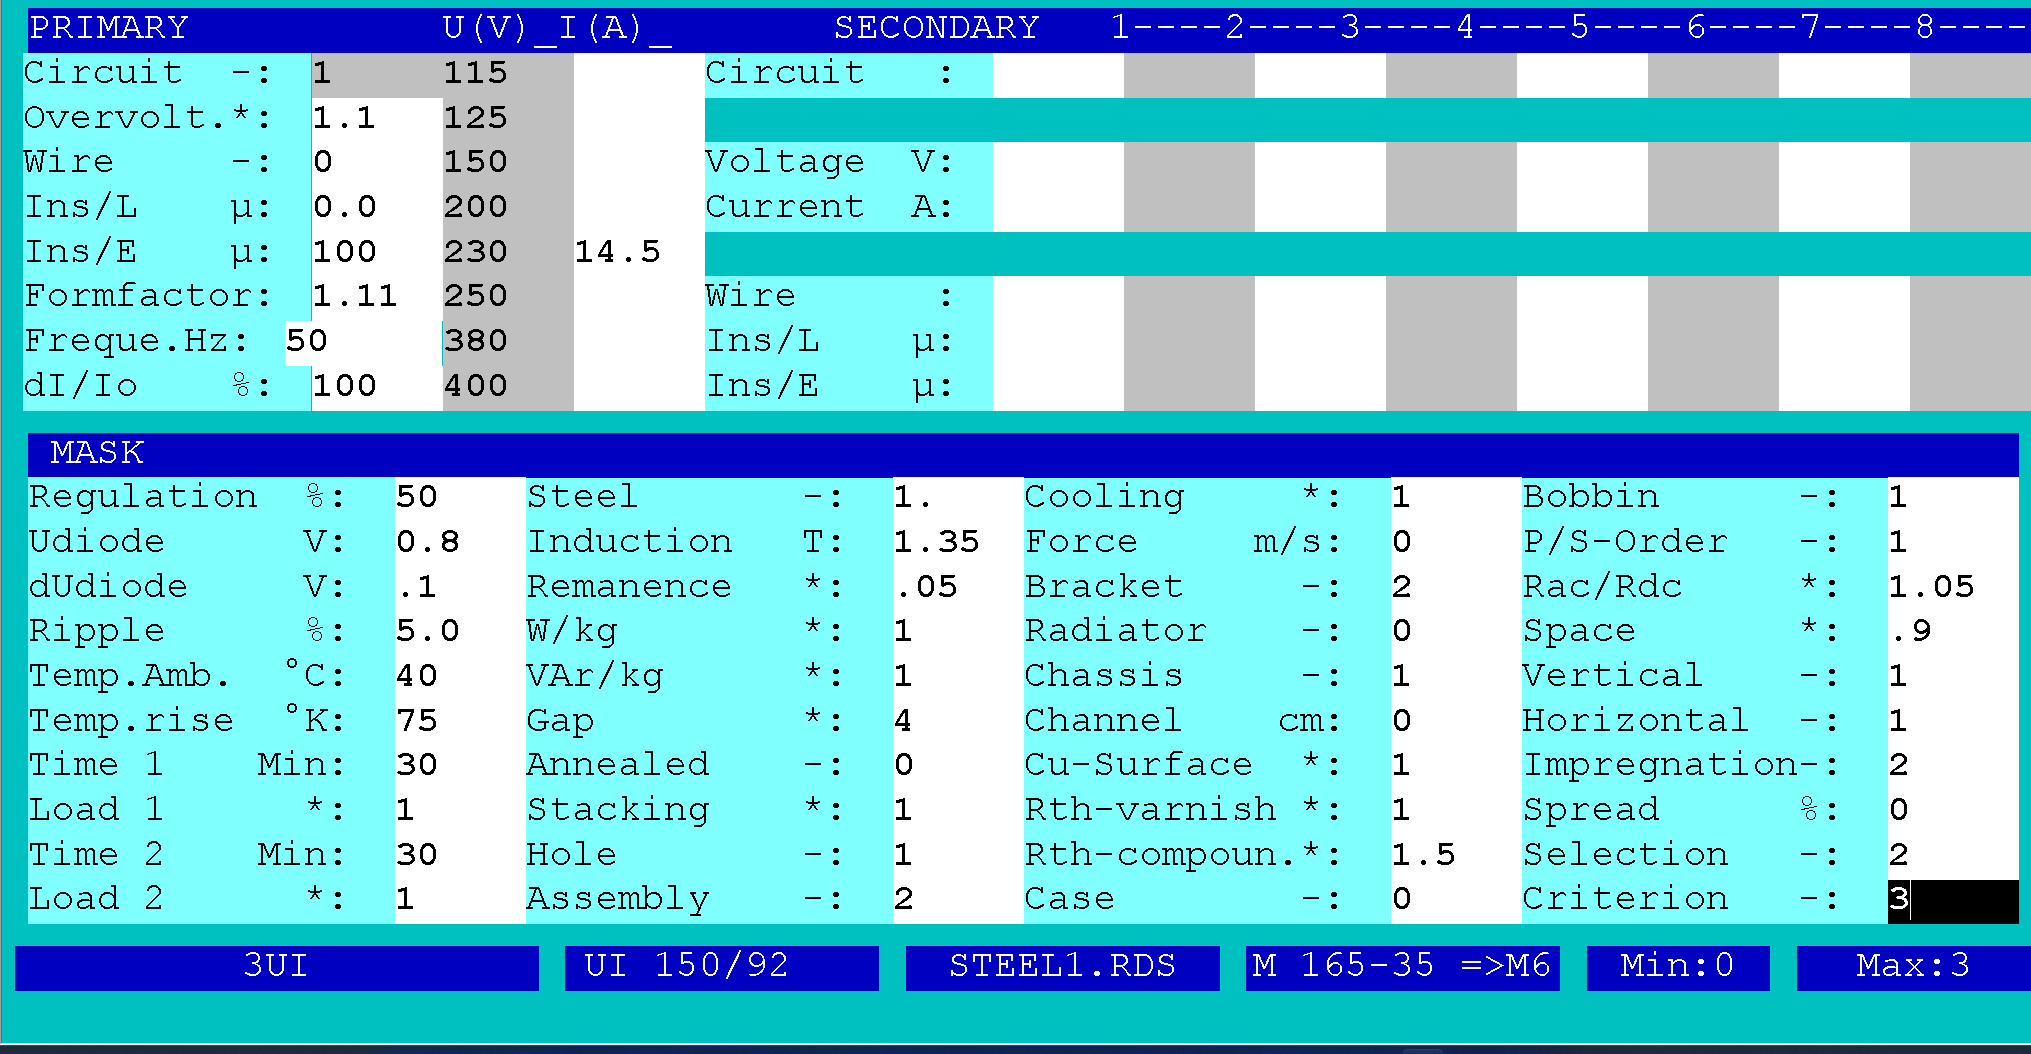
Fill in the design input mask as follows. If you need any help, press functions key F1. There is extensive description for each input field.

Note that the core&bobin are selected by hand out of the existing data base.
The primary Circuit is set to 4 for the star connection of the windings. The Overvoltage = 1.10 means that the prescribed temperature rise of 75°K must not be exceeded at the 10% overvoltage of the primary voltage. Note that the induction is set lower in order to limit the inrush current. For this reason the core is constructed with a defined gap of 0.10 mm (Gap = 4 x 0.025mm= 0.1mm with Assembly = 2), so as to reduce residual magnetism (Remanence= 0.05 x 1.35T = 0.065T).
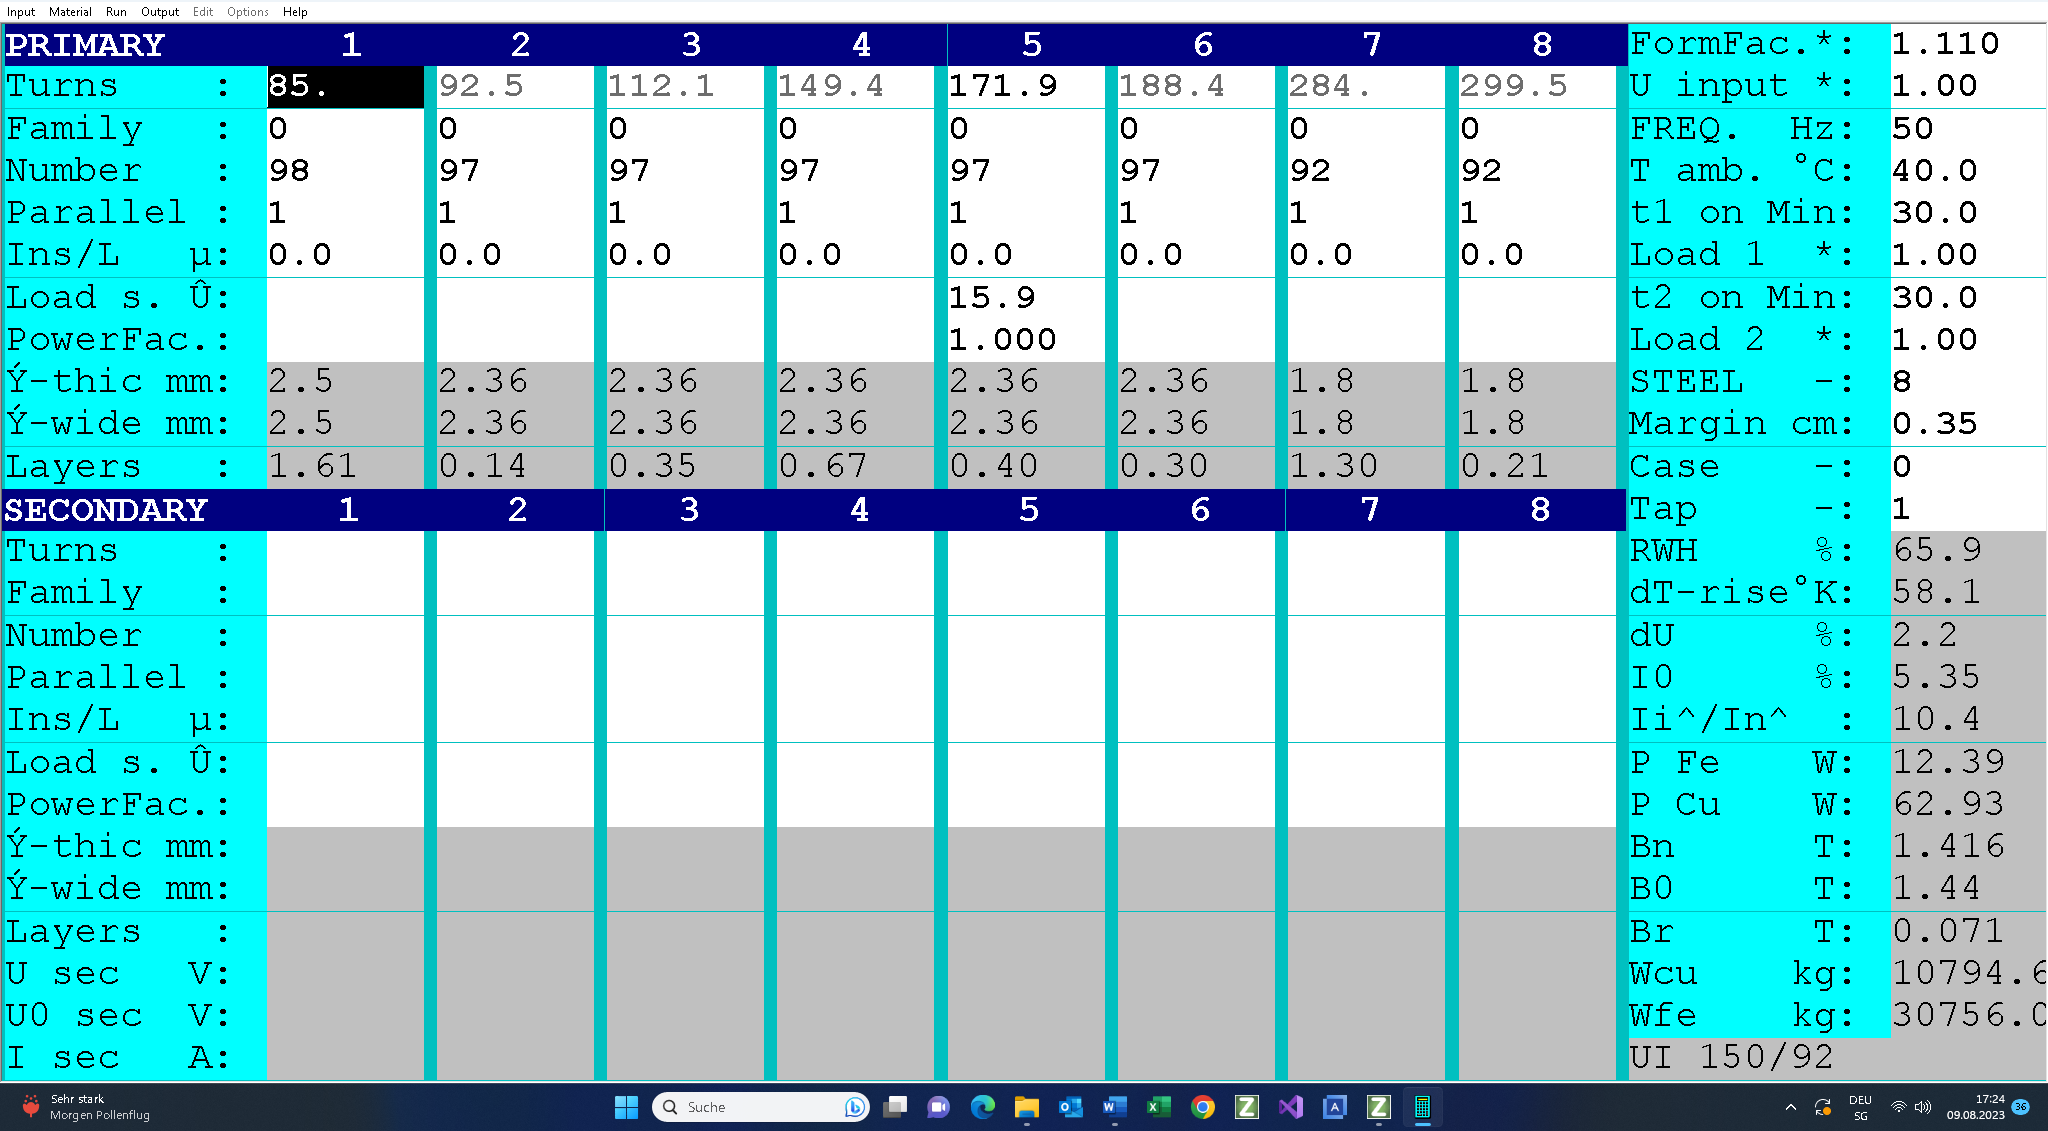
Start your design work. On completion of the design work, the following design data will be available and can be printed on the three pages (click on the link).
This is followed by checking the design data:
• We now check the winding data and the filling factor (65<100%).
• The maximum temperature of the windings is 40°C+70°K = 110°C < 115°C.
• The inrush current factor is slightly less than 558/560<15.
• The primary windings’ wire size calculated by the program is not optimized for production. In the test program, only three-wire thickness should be employed: 2.50mm to 115V, 2.36mm between 115V and 230’V and 1.80mm between 230 and 400V.
This is followed by checking of the output voltage at the nominal input voltage of 230V: Uin = 1.

Click on the link to print the results.
It is recommended at this position that you change the input voltage tap (Tap = 1…8) and test temperature rise and the output voltage. Note that the program starts designing by the tap with max. core power and selects the wires for the max. power losses in order to control prescribed temperature rise. The value of the output voltage can be designed as prescribed only for ONE input voltage.
If the design data is not satisfactory, then there are two ways by which we can implement the desired correction:
• You can return to the input mask (function key F2) correct the input data and redesign the transformer.
• Or you can access the test program (function key F5), modify the designed transformer manually and redesign the transformer by that means.
• On completion of the design work, you can print out the design data on-line, or save it on your local PC and print it out off-line. The output data file from this design example, CAL0012E.TK2 is supplied together with this document. Copy it into the directory in which your Rale demo program is installed.
Tips&Tricks
For three phase autotransformer and non-symmetrical load
If you have designed an autotransformer for the operation in accordance with the following figure A and your autotransformer works under the operation described in the figure B, it is recommended to inherently use a thermal protection. But if you don’t like to use a thermal protection, then use the following table for the declaration of the allowed non-symmetrical load of your autotransformer.
| Uin/Uout | Ioutx/In |
| 0.95 | 0.15 |
| 0.90 | 0.25 |
| 0.85 | 0.30 |
| 0.80 | 0.42 |
| 0.75 | 0.50 |